Did you know that March 31 was World Backup Day? Yeah I didn’t either. But for shits and giggles, I decided to finish writing this post which I had started late last year. Hope you enjoy…
Anyone who works with any type of data files should have a comprehensive backup plan. Which pretty much means everyone who uses a computer. As a designer who’s been working professionally for over 20 years, having a good solution that works is incredibly important. Over the years I cobbled together something that works for me, but I wanted to codify it and share it, in case it might work for you.
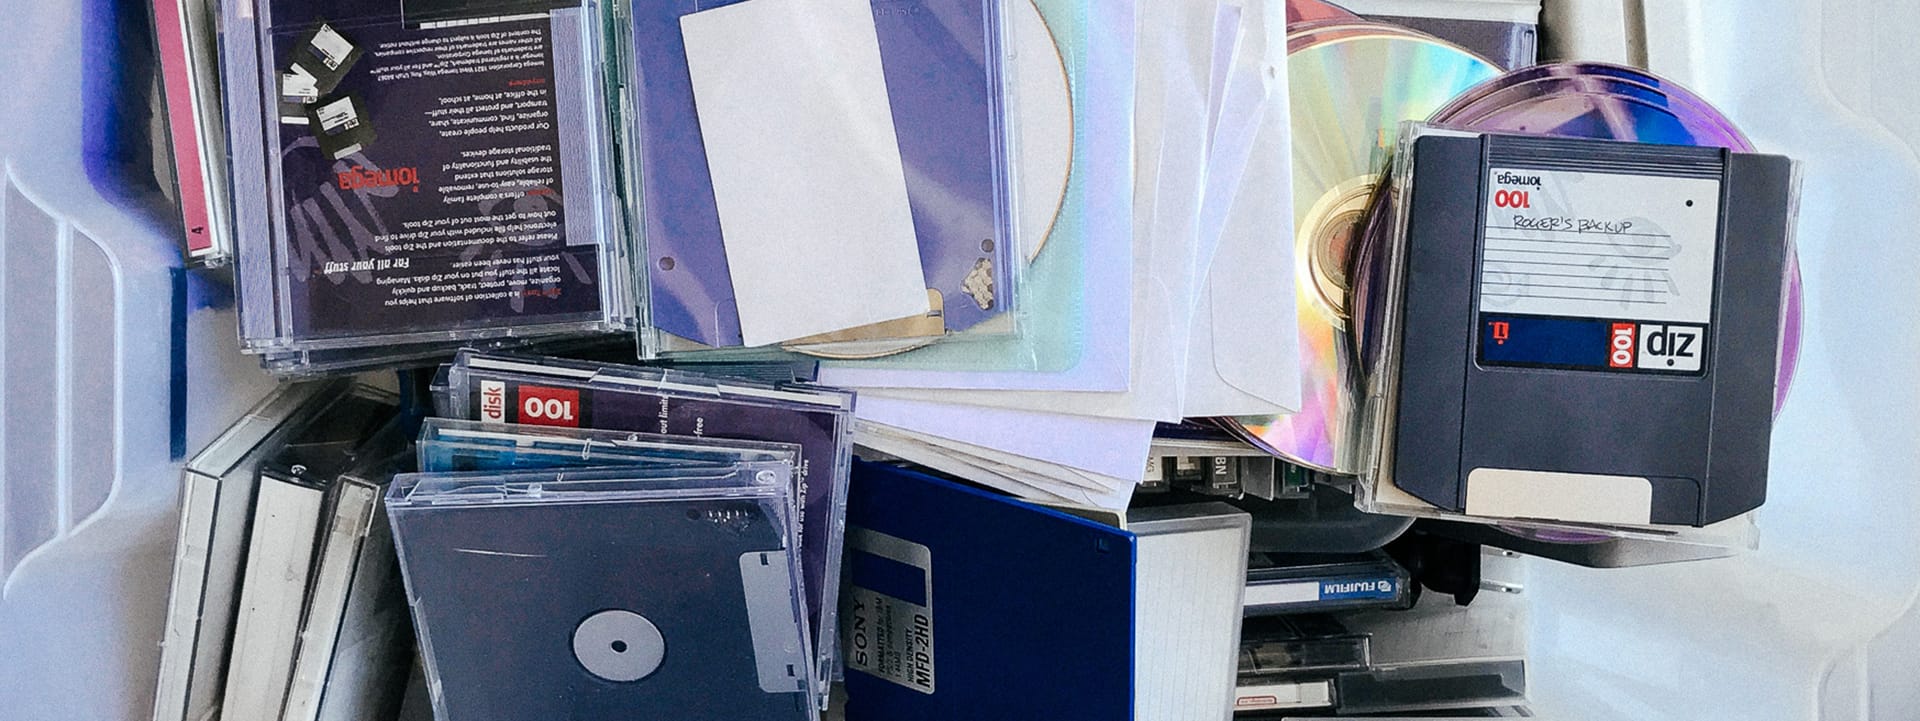
I’m a data packrat. Since my early days with my 512K Mac, I’ve tried to save everything that I’ve produced. Therefore there’s a big plastic bin filled with 400KB and 800KB floppies, DAT backup tapes, SyQuest cartridges, Zip disks, Jaz disks, CD-Rs, and SCSI hard drives, containing many years of work. Eventually, I’d like to extract all those files onto a modern medium, like say, the cloud, but that’ll have to wait until I have much more time on my hands.

Anyway, as a designer, I accumulate a lot of work files. At some point in the mid-aughts, I had a massive hard disk failure on my main work drive, which contained portfolio pieces from three or four jobs. Five-to-seven years of archived work disappeared with a screech. I sent the poor silver LaCie Big Disk (all 2GB worth!) to a data recovery company and crossed my fingers. A couple of weeks and $2,000 later, all they were able to recover was about 60% of the data, in loose, unorganized files, some even with generic names like “Photoshop Document 01.psd.” Because a lot of my work from that time were Adobe Illustrator or QuarkXPress files with placed assets, it was all pretty much useless. Sigh.
Since then I vowed to always back up my work onto a redundant medium. Enter RAID.
RAID stands for Redundant Array of Independent Disks. It’s a technology that acknowledges that failure is inevitable and therefore builds in redundancy. There are a number of RAID levels which you can read about here. The gist is, for almost any RAID level except 0, if one of the hard disks fail, the data will still be protected. The first device I purchased was a 1TB Buffalo Terastation Networked Attached Storage (NAS) to which I manually copied all my music, photos, and whatever archived work I had left.
It worked fine for a couple of years until my storage needs started to grow exponentially (I just had a child and therefore wanted to take digital pictures of everything she did!). But I realized that upgrading the storage on the Terastation wasn’t exactly easy. While theoretically it was RAID 5 and pulling out a hard disk and replacing it with a bigger one should have been fine (then repeat for each of the four disks), I just wasn’t confident. The tools they had at the time made it look like a chore. So the next move was to a Drobo.
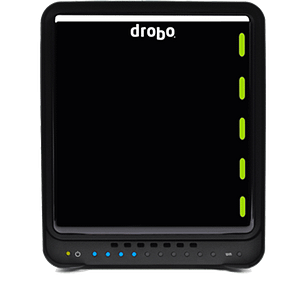
Drobo’s proprietary RAID system seems like a dream because I could expand it whenever I wanted to! It also involved me getting a Mac mini and connecting the Drobo to it, since they didn’t have a NAS option at the time. Also around this time I discovered CrashPlan. So now I could use CrashPlan to continuously back up to the cloud and to my Mac mini plus Drobo server. Additionally, I had CrashPlan running on the Mac mini and it backed up the entire Drobo to CrashPlan’s datacenter as well.
The Mac mini plus Drobo combo served me well enough for a few years. But I did have a couple of complaints. First of all, the Drobo model wasn’t exactly quiet. With the Mac mini in the living room and part of the entertainment system, the device was just a bit loud. Secondly, the Mac mini was mostly idle as I didn’t really use it much to view media on my TV. Yes, I could have solved the first issue by moving the Mac mini out of the living room since it wasn’t really necessary for it to be there. But I didn’t.
Because I’ve had to move around a bit in the last few years, the mini and Drobo went into storage. Recently I finally settled down and started to think about setting up the Mac mini + Drobo server again. But I also knew that it had been in storage for over four years. My hunch was that it would be dicey, so I decided to upgrade to a new NAS.

In the years since buying the Drobo, NAS technology really accelerated. Modern NAS servers seem to have come down to two brands: Synology and QNAP. After much research, I purchased the Synology DS916+, a four-bay NAS, and I outfitted it with four 3TB drives, formatted the unit as RAID 10, for a total of 5.5TB of storage. Synology’s DSM operating system software is pretty cool in that you can install numerous apps and use it as a mini server. Although it’s really not recommended that you use a NAS server for anything robust, as their processors are usually underpowered. I chose to format the volume as RAID 10 for both redundancy and speed. Although in hindsight, I would probably use Synology’s SHR format next time to eke out a little more space.
Once set up, I dug the Drobo out of storage and plugged it in. It didn’t sound too great at all—after all those platters hadn’t spun in over four years. But it stayed alive long enough for me to retrieve all the data and copy it onto the Synology. Years of work, photos, and music data was safe again.
Enough backstory, here’s the plan. The best backup plan is the kind that you don’t think about because it’s automatic and constant. To have to manually think to back up your files is an immediate fail. Because you won’t remember.
For me, the goals of my backup plan are:
To reach those goals, the solution really calls for a two-pronged approach: local and cloud. Local is handled by the Synology NAS plus CrashPlan. And cloud is handled by a combination of CrashPlan and Dropbox.

For Macs, Apple has a built-in backup solution called Time Machine. You can switch it on and point it to an external hard drive, or to a network-mounted drive, like a NAS. But it’s for local backups only. And since I was already using CrashPlan to back up to the cloud, I can also use CrashPlan to back up to my Synology NAS. It’s automatic and always running in the background. If I need to restore anything—like I accidentally deleted a file—I can do so via the copy on my NAS, which would be a lot faster than from the cloud if it were a huge file.

With CrashPlan backing up to my NAS, I always have two local copies of every file.
A key part of my workflow is Dropbox. All my project files are placed into Dropbox for realtime cloud backup and sync. And while I’m always really good at saving versions and iterations, there’s also the peace of mind that I can revert via Dropbox if I needed to. And best of all, I can always access work on my iPhone while on the go, in case a client needed a file and I was nowhere near my computer. Which I’ve used at least a few dozen times. I can’t recommend enough to use Dropbox in your daily workflow.
Now Dropbox is great, but there are limitations. Their upgraded individual plan is only 1TB, so it’s not great for my archival purposes. My music and photos alone take up over 600GB.
I’ve mentioned CrashPlan a couple of times already in this piece, but let me dive a little deeper. I install CrashPlan onto every computer I own—my MacBook Pro, my PC, and my wife’s MacBook. I have it back up my user folder which contains all my data files, including everything that’s synced with Dropbox. CrashPlan will also keep versions of files. And all my backup data is encrypted so no nefarious entity can go digging through my data.

Adding Dropbox and CrashPlan, I now have two copies of the same file in the cloud. This means for any given file, there are four copies: two local and two in the cloud.
Now the only piece of the solution that isn’t being backed up is the NAS. Back up the backup? Yes! Redundancy, redundancy, redundancy! I back up the Synology NAS to the cloud as well since it contains archives of project files, photos, and music. I do not back up the CrashPlan and Dropbox data that’s on the NAS. But for everything else, I use Synology’s built-in Cloud Sync app to sync with Amazon Cloud Drive. This awesome service from Amazon gives you unlimited storage for one flat yearly price. Well worth it.[1]
With revelations from Edward Snowden about how the NSA and other spy agencies had developed tools to snoop on Americans, I—and the rest of the web—have been much more aware of security. That’s why for all of the cloud services I mentioned, I’ve enabled both encryption of my data as well as two-factor authentication where available.
I like my plan and it works well. But it is missing something. Namely all the pictures and videos I take with my iPhone are only getting backed up in one place—Apple’s iCloud. Yes, the media is also on my MacBook Pro which is backed up to the NAS, but it’s fleeting and gets deleted automatically when I’m running low on space and macOS decides to optimize my storage. I wish there were a direct way to sync all my photos to my Synology NAS as well. But in my research so far, it doesn’t seem possible. Will need to revisit this one in the future.
The origin of my backup fanaticism is tragic, but as certain as death and taxes are, so is data loss. Hard drives crash, laptops get stolen. It will happen. While my backup plan might seem overkill for your needs, feel free to tweak and modify as necessary. At the very least get a cloud backup solution like CrashPlan[2] so that your data is protected at least once. Fit Dropbox[3] into your workflow if you generate any amount of files. And then add a NAS when you can.
Having a comprehensive backup plan that’s automatic, that you actually use, will ensure that you can recover quickly and easily when one day you hear a big screech from your hard drive.
Notes:
[1] There is a way to install CrashPlan on the Synology NAS as well. I tried this for a couple of months, but ultimately gave up on it. It’s not an officially-supported platform for CrashPlan and took up a huge amount of resources from the low-powered processor in the NAS. Using Cloud Sync to back up to Amazon Cloud Drive was the best solution I could figure. However, it is only a copy of the current state of the NAS, and not a true backup with versions.
[2] There are other great cloud backup solutions besides CrashPlan. For features and pricing, CrashPlan continues to be the best fit for my needs. Check out this excellent roundup of backup services from The Wirecutter for other options.
[3] Dropbox was the first to the market with a cloud sync solution that just worked. I’ve tried Google Drive, Box, OnDrive, and others, but Dropbox works best for me. Feel free to explore the other sync solutions.